Friday, January 27, 2012

Funnel Cake

My beautiful daughter is going through a strange, inconvenient and often annoying phase. She won't eat anything unless it looks like a shape she can identify. Somethings I can get away with, "See! It's like a bouncy ball!" as I hold up an orange. Other's I have to create. Cookie cutters have been my saving grace.

With Valentine's right around the corner, a heart was the most logical route to go. I don't think I would have gotten away with "Look Morgan! It looks like the large intestines string!"


Now I'm not going to let you try this without me telling you the truth. I'm not going to pretend to be the whiz in the kitchen that many of you think I may be. The reason why funnel cakes are normally drizzled in a circle is because the batter has a mind of it's own once it hits the oil. That's a given though, pouring a thicker liquid into a thinner, it's going to float around. You just have to play with it. Try to shape the heart quickly, then swirl inside.

Funnel Cake
1 cup sifted flour
1 tsp baking powder
1/4 tsp salt
1/2 tsp cinnamon
1 egg
1 cup milk
vegetable oil- enough to cover the bottom of the pan, an inch deep

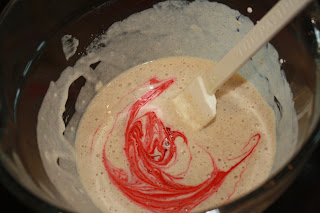
Mix all the dry ingredients together. Add the egg and milk. I then added a touch of red food coloring.


Pour the batter into a squeeze bottle. Make sure all the lumps are out so it won't clog. If you don't have a squeeze bottle you can pour a ladle full into a funnel with your finger stopping the end.

Heat oil on medium high heat. Oil will be ready when you splash water onto it and starts to sizzle. Squeeze out a heart into the oil then swirl to fill in the heart. If it mis-shapes just add more around the outside to reshape it. As long as you are pouring it close enough and partly on top of what you had already squeezed out, then it will stick together.


Flip it after about a minute, then a minute on the other side. Drain on a paper towel. Generously add powdered sugar and any other toppings of your desire.

This is actually a breakfast at our house every now and then. Just to shake things up a bit.

Imagine getting served breakfast in bed with this treat!


Tuesday, January 24, 2012

Southwest Turkey Sliders

Lately I have been trying to makeover my recipes to more healthy versions. I have made sure to increase our fresh fruit and veggie intake. Spinach and fruit smoothie's have become a favorite in our home. We have almost completely cut out red meat. We still have it occassionally, about once every week or so. Ground turkey and chicken tenders have been the usual replacements.

One thing that Corey, my husband, and I took great pride in are our awesome hamburgers. It all started when we were watching the Food Network and heard about some festival somewhere (like we were paying attention to that part. Hello?! There was food on the tv!) that people would go to from around the country to show off their best hamburger ideas. That's when we busted out the grand idea- We need to create a signature burger. And that we did.

This is not the exact recipe. This is a slightly more healthy version. And, of course, smaller (portion control, people).


Majority of my own recipes are very versatile. You will find that a lot of stuff can be replaced for something else that you have in your pantry. That's what I love about it. Who has time to run to the store for one missing ingredient? Not this mom with two young kids.


For this you will need:
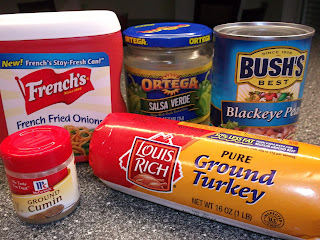
  • 1 cup French's Fried Onions
  • 1 lb ground turkey
  • 1/2 tsp ground cumin
  • 1/3 cup salsa
  • 1 can beans, drained and rinsed
  • Buns (I normally use the Hawaiin King Honey Wheat Rolls)
  • Pepperjack cheese
I used blackeye peas because my daughter goes crazy for them. However, black beans would be more true to the Southwest part of the sliders. Any bean will work, it's a great add in since we will be using turkey instead of ground beef. Also, I used green salsa because it is what I had on hand. I have always used regular salsa and absolutely love the way it turns out as well.


Pour everything into a large bowl and mix well. Add more fried onions if it seems too runny.

Form into about 2 inch patties with your hands, cook well on the skillet or on the grill. Cook at 250 F that way it cooks slowly and all the way through. Remember that it is turkey, so no medium rare for these sliders! Top with some pepperjack cheese and all other condiments you enjoy. I added spinach and chipotle mayo onto ours.


They taste amazing! It has enough flavor that you won't feel like you are missing out on anything with it not being ground beef.

Friday, January 20, 2012

Valentine's Ornament

Let me first say that it took me three days to make these! Not because they are difficult to make, but because my two year old thought it was an Easter egg hunt and hid ALL the little circles around the house. She had a laughing fit when I found the first one. One of like, 50?! I never knew we had that many hiding spots in this little townhome. She's gonna kill it at this year's egg hunt.

Valentine's, in my house, is a holiday we never decorated before. Ever since I started getting more crafty, that all changed. Time to spread the love.


These ornaments can be made in any color (for any holiday really), any size and be put anywhere really. Make ten of them and put them in a bowl for a centerpiece. Add ribbon (like I did) and hang them. Add ribbon on the bottom as well and add the children's initials. The possibilities are endless really.

You will need scrap book paper (I picked four different sheets), glue (I used hot glue gun), pencil and scissors. Ribbon also if you would like to hang it.


Find something perfectly round to trace circles. I used a sweet tea glass, my ornament is about 6 inches tall. Depending on what size you want depends on what you use to trace the circles. Don't make them to small because there is folding involved. Get as many circles as you can get from each scrapbook paper. I traced on the back side so no pencil marks will be on the front. Cut all the circles out.


Next part is kinda tricky. Lot's of trial and error. The point is to get a triangle out of the circle, so each flap is sized evenly.

Make a stensil of your triangle. I would trace the triangle on the circle and fold three circles at a time with it. If your flaps are not evenly sized, then the ornament will not fit together properly.


Now fold all of the flaps up.

Glue the flaps together with the flaps sticking up. You will first start with a circle, there are five pieces in my first circle, then I went from there. There are twenty pieces to each of my ornaments. When it came to the last two I hot glued a looped ribbon in between the two flaps.


Wednesday, January 18, 2012

Easy Pepperoni Bread

This stuff is freaking awesome if I do say so myself.

I have yet to find someone who doesn't like my famous pepperoni bread. It's gone before the end of the night. Plus its super easy to make.

I started making this about five years ago before we had kids. It was during our drunken partying social gathering days. How does the myth go, "eat bread when you drink because it will help soak up the alcohol"?

Now that my days consist of tea parties, Toy Story and play dough, I now use this recipe for playdates, Tupperware parties and snack time.

Different setting, same end result. Success.


I'm giving you the recipe for one Pizza Bread loaf. However I normally make three at a time.


You will need one Pillsbury French loaf (straight from the fridge, cold is easier to work with), shredded mozzarella cheese, pepperoni slices and one beaten egg. To make three loafs I buy three of the French loafs and two bags of pepperoni.


Start by unrolling the french loaf. This is why you want it to be cold. Sometimes it wants to stick together and it's hard to find the crease where to start unrolling. Lay it on a lightly floured surface. Baste one side with beaten egg, just enough to wet the top, but don't leave puddles.


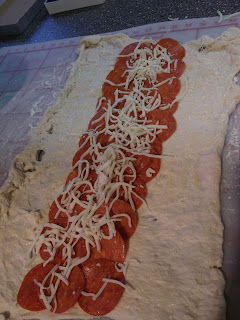
Down the center of the dough line up pepperoni in rows of three. Sprinkle cheese over the row.


Fold one side over the middle and once again line up pepperoni and sprinkle cheese. Fold over the last side to seal the loaf closed.

Cook on a greased cookie sheet according to the temperature and time on the French Loaf directions or until golden on top.


Cool on rack and slice. Serve with pizza sauce, but we have always eaten it plain.

Tuesday, January 17, 2012

Valentine Pockets

Christmas has stockings.
Easter has baskets.

Valentines. What's your plan for the kids? Exactly my dilemma.

My kid's get one small gift for Valentines Day (like $15 tops). I don't want to wrap it, that's too birthdayish and Christmasish (like my new words I made up?). So I made Valentine Pockets! Very similar to the Valentine envelopes you see circulating through Pinterest.


Just big enough so I don't get too carried away. I can fit in a book or DVD or Barbie or set of boxcars.


So the Valentine Pockets consist of felt, cardboard and yarn (not pictured). I had bought a new tree skirt this year when all the Christmas decorations were on sale so I was able to upcycle my old one. The cardboard is from a box sitting in our garage. You will also need a sharpie, hole puncher, scissors and hot glue gun.


Start by drawing a heart on the cardboard. As big as you would like it. Cut that out once you have the perfect shape you want.

Then using two layers of felt (one for back of the pocket, one for the front) trace the heart you made from the cardboard BUT REMEMBER to outline about 1/2 inch away form the cardboard. That way the felt hearts are slightly larger. Cut those hearts out as well.


On the back of one heart draw a line across, about 2 inches from the edges, to cut as the opening of the pocket. (my picture really isn't blurry, it's just the bottom of my tree skirt looked like that).

Apply hot glue on one side of the cardboard. Press it down onto the center of the felt heart that doesn't have the pocket opening so you have a felt edge of 1/2 inch around the whole cardboard heart. Apply hot glue to only the edge of the exposed cardboard heart. Apply the other heart.


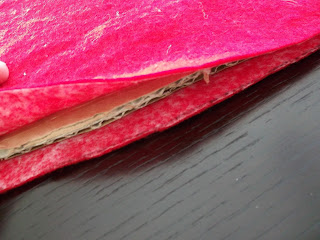
You should now have a cardboard/felt heart sandwich. The bottom should be the felt without the pocket opening and should be completely glued to the cardboard. The felt heart with pocket opening should only have the edges glued down so it's a giant pocket.


Now around the outside punch holes through both  felt hearts (this is why we left a little space away from the cardboard). This is going to take a little bit of strength. Felt no like hole puncher. I no like hole puncher.

Finally, string the yarn through the holes starting from the top and ending at the top. Tie a big pretty bow.


This project cost me nothing. That's what I heart about it. 

Saturday, January 14, 2012

Musky Smelling Towels

You can't lie to me.

I know that you have had the dillema of a musky smelling towel before. Whether it be a wash cloth, dish cloth, hand towel or bath towel. You thought you could simply just wash it and that Tide will do it's job. Problem solved.

Yeah, not really.

That musky smell needs a little kick in the butt to get rid of. Fear no more my friends! I possess the secret weapon! And about 99% of you do as well. Vinegar.


Yep, good ole white distilled vinegar. I have heard of people using baking soda and I've tried it before, but a clump was left on one of my husband's shirts and I had to hear about it for a while. Needless to say I now keep my baking soda far from my laundry room.

Just add 1/3 cup of vinegar to a full wash. Still add all that other good stuff as well, just throw in the vinegar as a bonus. I promise your towels will not smell like a pickle. And guess what else they won't smell like- musk.

I do this about once a month. I also do this with linen that has been sitting in the closet too long. Or a child's favorite blanket that has been puked on.

Now that you read this I better not catch you with some musky smelling towels.

Thursday, January 12, 2012

Weekly Cleaning & Organizing

So by the time spring cleaning comes around, you realize that over the year you accumulated so much junk. And as you clean out that closet, you think to yourself "I could have had all this extra space without this crap". Or at least that's what I do.

My spring cleaning came early this year when the kids got croup. I needed to disinfect the house and I got a little carried away.

Realizing that this needs to be done more than once a year, I have decided to tackle one small area a week. Area's that are often forgotten about.

So now I'm asking you to join me once a week. Because if I go to your house and see that it hasn't been done, I will disown you. Not really, but this will honostly only take about 30 min-1hr, a WEEK, not a day. Heck, you could do this during commercials of American Idol, because Lord knows they have more commercials than the actual show.

This week we are going to attack the kitchen drawers. (No pictures with this post because I'm hoping your mom taught you how to clean. If you need pictures feel free to email me. I will not email pictures, instead I will share it with my friends and we will all have a good laugh).

1) Starting with one drawer at a time, take EVERYTHING out. Even the utensil divider.

2) Spray in disinfectant spray that is okay to use on your drawer (whether wooden or plastic) and wipe clean. I even took the drawer out and cleaned the track, the sides and the handle.

3) Now only replace the items that you use EVERYDAY.

4) Throw out the junk and stuff you just want to donate or get rid of. Throw out the double of an item.

5) You should now still have a pile of stuff that you want to keep, but don't use everyday. Replace the items that you have used in the last six months.

6) Ready for this? Throw out or donate the rest. "But Jess, I NEED my flask funnel!" No, my friend, you don't. Use a kitchen funnel to get that whiskey in your flask. Or those mini tongs- if you host parties often then go ahead and keep them. If you bought them years ago, used them once and forgot about them- then I'm sure you could make due with forks to serve up appetizers at your next party.

Now for the rules of numbers.

Do you have three serving sets? Now really, how many extra large forks do you need? A serving set usually has the large fork (meat), a large spoon with holes (veggies) and a large spoon without holes (carbs). Get rid of the rest!

How many steak knives do you have? Our rule is that we have one for every seat at our table, so we have four. We also only have six nice knives. One is a knife set consisting of four knives of different sizes. We use this for cutting meat, fruit and vegetables. We have one bread knife and one large heavy duty knife for potatoes, onions, etc. You don't need any more than that. Get in the habit of washing your knives right after you use them so one that meets your need is always available.

You  don't need six whisks people. I'm a baker and I don't even have six whisks. I have a small one for eggs and a larger one for everything else. Once again, get into the habit of washing them right after you use them so there is always one available.

Three spatulas should be more than enough.

One soup ladle, one gravy spoon, one spaghetti server. Because lets be real, do you really have more than one of these served at one time?

One ice cream scoup, one pizza cutter, one can opener, one vegetable slicer. If you refuse to get rid of the doubles of these then you are just out right a hoarder.

One cake and pie slicer/server, one punch ladle (or if you want to get extra points, just use your soup ladle), one meat thermometer and I'll throw you a bone here: TWO basting brushes because they can be difficult to clean.

Finally- dish towels. If you do laundry once a week, then seven dish towels should be plenty. Ten if you really want. As for hand towels in your kitchen, don't exceed five. I'm not going to believe your lie that you don't reuse your hand towel a few days until it's ready for the wash.

You will not be without if you follow these rules. You will learn to make due with what you have and you will have a much more organized kitchen.

Wednesday, January 11, 2012

My Not-So-Secret, Secret Baking Weapon

Baking is a science. Unlike in cooking where you can take a pinch there, throw in a little basil and salt to taste- Baking, rather, needs to be measured, re-measured and timed perfectly.

The eggs, butter and milk must all be the correct temperature (room temperature to be exact).

Dry ingrediants should be sifted together for even distribution.

Don't whip it together long enough- you get seperation. Whip it too long- you can get either too many air bubbles or a soupy result (depending on what your baking).

All in all- you need to make sure everything is in order when you bake to get the best possible result.

One thing that we forget about, or rather think the job is done for us, is getting the correct oven temperature.

Okay, now is your turn to say "Um, Jess- I have a digital, American, brand new oven. So lay off." Well now I'm about to crush all your dreams: Ovens. Are. The. Devil.

Not really.

But they do get it wrong. A lot of times. Majority of ovens have hot spots. Thats a spot in your oven that will get hot and stay hotter than any other spot. They even have cool spots. Just take a guess on what that means.

So now you are thinking "Oh Jess- Please. Tell me what I can do to fix this catastraphy!"

No worries- I possess the sercet weapon. Actually, your local Walmart does.


It's as easy as a $5 oven thermometer.

This little gadget sits or hangs from your oven rack and tells you the correct temperature.

Let me show you what I am dealing with here in Germany, and why I felt the need to buy one.


Yep. Celcius.

Ten points if you can tell me the conversion equation for Celsius to Farenheit off the top of your head. Anyone? Didn't think so.

I have an app (God Bless iPhones) for conversion and it was telling me that 175 C would get me to 350 F. In the words of my husband " Ra Ra Ra WRONG!" All my cupcakes were chewy on top, raw in the middle. And I knew the back left corner was a hot spot because everytime I put in cake (TIP: when baking two round cakes in the oven at the same time, put them in diagonally, not side by side, for a more even bake) that corner burned the poor soul I put there.

When I came home with this little guy I decided that I first needed to know what temperature 350 F really is on my oven. I also needed to figure out my hot and cool spots. I put the thermometer dead center and turned it on 175 C.

HOLY SMOKES!

It was 420 F! All those nights of being so angry when my chicken lasagna was still raw, but looked done.

I then placed it at each corner for 15 minutes each to find out where my hot and cool spots are. One really hot spot, one slightly cool spot. I can live with that.


My thermometer now hangs in the back of my oven so I can always see what the temperature is. I really only take it out to clean.

Can I just point out how ridiculously small my oven is?

Tuesday, January 10, 2012

Pretty Princess Dress Up Corner

Every girl needs her own space.

Even when your 2.

So I did this project before I decided to do a blog. That's the reason for no before pictures. It's simple enough, though. Once you see everything broken down it will be one of those "duh anyone can do that!" moments.


We chose a small spot on her wall behind her door and next to her wardrobe closets (Germany doesn't have real closets. How do these women manage?!). I had figured that would be the best spot just in case I go into one of my deep cleaning and re-arranging modes. Which, be warned, it happens often. This way it will never be in a spot where I want to put a dresser.

I started with an old window curtain rod. I have like five of these in my garage from moving from the states. So yes, expect more DIY projects with these nifty gadgets we take for granted.


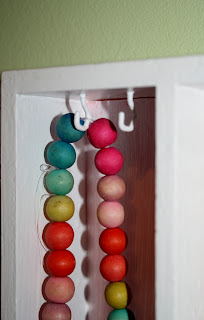
I went to the store on the search for "S" hooks to hang from the rod, but came across these shower curtain hooks which work even better! They hold twice as much with two hooks on the end.


The jewelry holder is ..

ready for this ...


... a utensil divider.

Another upcycled piece I had in my garage from moving to Germany. I had my husband sand it down (he claims that I don't put enough effort into sanding .. psshhht) then I painted it white. To add just a bit of extra color I put pink scrapbook paper on the back of each divided cubby, then painted the white thinly over it to give it a white-washed antique, yet girly girl feel.


I then just simply screwed in miniature hooks. These were diamond hooks that I had to open up by pulling the end with pliers. I'm sure if you search, it won't be hard to find open ended hooks.


This whole project cost me a whopping $4.50. I already had everything except for scrapbook paper and shower curtain hooks.

Don't have a little girl? The curtain rod could also be used to hang super hero capes. It could go on the inside of your coat closet for the kids to hang their own coats.

Heck, I could even hang one for myself for the million and one scarves I own.

Maybe if I actually see them up, I will start wearing them again.

I can see it now, me with a scarf on. Fresh spit up shining in the sun on one side, Morgan pulling the other side trying to get my attention as I am slowly being strangled.

Or maybe I'll just find a different DIY project to do with all the scarves...

Welcome One, Welcome All!

Before you decide to embark on this journey with me, let me just get a few things out of the way.

A few apologies to be exact.

1) I apologize for any and all grammar mistakes. Believe it or not I did graduate high school, but like that was what- 7 years ago? Times have changed. I'm sure they have some new laws in English now. And I am most certain my kids will come home from school (when the time comes) to tell me how lame I am for not speaking the correct lingo.

2) I apologize for the abundance of lame jokes you will find on this blog. Let's be honost, I have two kids. Two extremely young kids to be exact. So I will either 1) be sleep deprived so my attempt at a joke was just a lack of me being able to put two thoughts together or 2) pretty darn buzzed off of mimosa's so just know that in my head, it was freaking hilarious.

3) Finally, I am extremely opinionated. I am going to try my best to keep this blog seperate from any personal feelings I may have towards the current day's topic, but I can't assure you that it won't happen. For instance: Yes I am a baker and yes I do have my own recipes, but when I'm in a hurry to whip up a cake (for a non paying customer) you better believe I'm gonna whip out  my box of Pillsbury Yellow Cake Mix. No I'm not a sell-out, I'm a busy mom and a wife and damnit Pillsbury makes some good cake!

So now it's your turn. I would love to hear in the comment section about posts you would like to see. I have a million ideas of what I want to post. This is (mostly) a  no limit blog. I will be posting recipes, tips, many DIY projects and much much more.